
Organized Groups: Berserker/Knight Warrior Greatsword | Axe build.
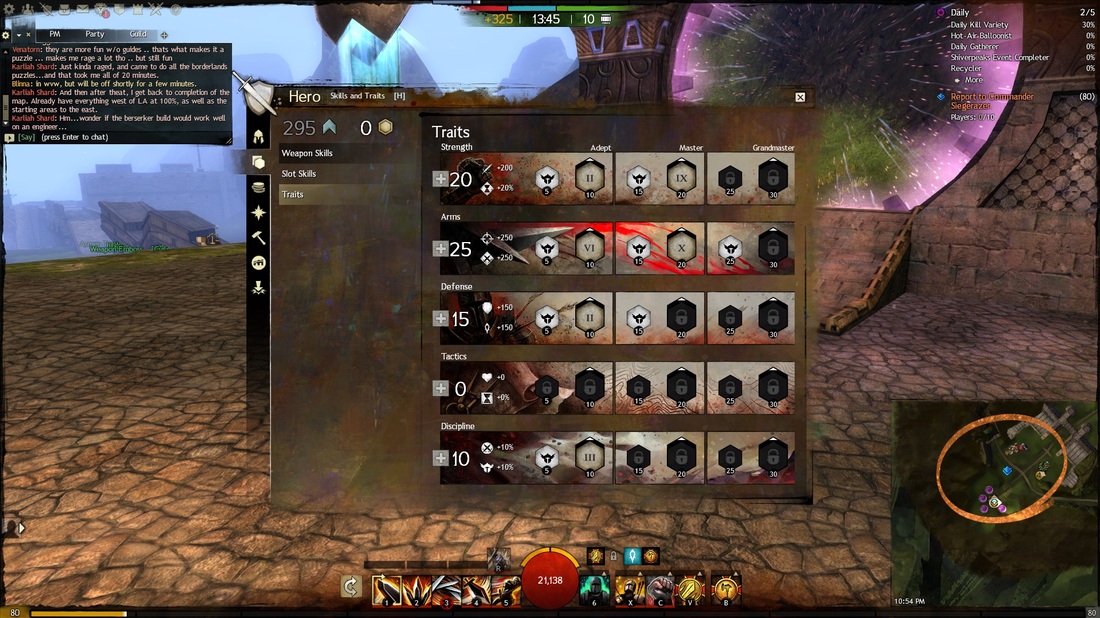
Traits:
Strength
II - Restorative Strength
The reason why I use this is because it removes cripple, chill, immobilize or weakness when a healing skill is being used. It will help you quite
a bit when your 'Shake it Off' is on cool down. Condition removal is also quite beneficial in instances.
IX - Slashing Power
This ability is pretty straight forward. It grants 10% extra damage when a great sword or spear is equipped.
Arms
VI - Furious Reaction
Grants you Fury (20% extra critical chance) and Vigor (Increased endurance regeneration - Dodge cool down time decreased) when you take
damage greater than 10% of your health. This ability has a 30-second cool down, so it will activate pretty often.
X - Forceful Great Sword
It grants you Might on a critical hit. Might is quite a complicating system. According to Guildwars2wiki.com, Might is calculated based on the
following formula: 0.375 * Level + 5 = Power and Condition Damage per stack (e.g. 35 at level 80). With 25 stacks of Might at level 80, you
will have +875 Power and Condition Damage. This ability also allows great sword and spear skills to have a 20% shorter cool down time.
Defense
II - Dogged March
This ability decreases the duration of chill, cripple and immobilize applied on you by 33%. You will also gain a 3-second regeneration when
you get hit by either one of these durations. This ability has a 10-second cool down, so it will trigger almost cool down-free.
Tactics
I don't find anything here beneficial for me. Aside from the fact that some other players will put their trait points on Tactics instead of Defense as it gives
increased boon duration and Empowered which grants extra damage for every boon you have applied on yourself, I personally prefer Defense
as it has Dogged March.
Discipline
III - Warrior's Sprint
This is a new ability added in a recent patch. It grants you 25% extra movement speed when a melee weapon is equipped. With this build, you are on
melee weapons almost all the time. Unless of course, you are required to swap to range weapons under certain circumstances, particularly in Fractals of The Mists.
Slot Skills:
Healing Surge
This skill is among two of the skills I use to instantly gain adrenaline. It has a cool down of 30 seconds. It also heals based on your level of adrenaline. In simpler words; The higher your adrenaline, the more effective the heal. I personally prefer this healing skill over the 3 others. Mending heals significantly less and removes 3 conditions. Healing Signet doesn't give a whole lot of passive healing and active healing. Prayer to Dwayna is the human's racial healing skill. I find this the least useful as it heals lower than healing signet and does not give you condition removal or passive healing.
Shake it Off
This is very useful. Firstly, it removes a condition on you and allies nearby you. Secondly, it can be used literally any time (except when fighting to survive) as it's a shout skill. For example, you're knocked down. Simply trigger this skill and you instantly get up with one condition removed. It has a 25-second cool down.
For Great Justice
Another useful shout skill. It grants 8 seconds of Fury (20% extra critical chance) and 3 stacks of Might for 25 seconds. Based on the formula given by Guildwars2wiki.com, you should have +45 Power and Condition Damage at level 80. Again, as this is a shout skill, it can be triggered at any time and it grants the boons to allies within 600 range from you. This shout can be stacked with other Might granting skills. It has a 25-second cool down.
Signet of Fury
This Signet grants you 180 Precision at level 80 when active and instant fully-charged adrenaline when activated. This is among two of the skills i use to instantly gain adrenaline. So when Healing Signet is on cool down and you need another alternative for instant adrenaline, you would want to activate this skill. I use this Signet simply because it gives me a higher critical chance due to the bonus precision it gives It has a 30-second cool down.
Signet of Rage / Battle Standard (Warbanner)
Both of these skills give you the same boons; 30 seconds of Fury, 5 stacks of Might (175 Power and Condition Damage at level 80) and 30 seconds of Swiftness (33% increased movement speed). Signet of Rage simply grants you adrenaline when passive and has a cool down of 60 seconds. Now, Battle Standard or as many Guild Wars 2 players call it, Warbanner, is to be used in dire situations. Once summoned, it will instantly revive allies who are fighting to survive within a 600 range radius and gives you and your allies the stated boons above. The banner will last for 2 minutes. However, this banner will only revive allies fighting to survive when it is FIRST SUMMONED. This means that if any of your allies were to fight to survive during the 2 minutes the banner is summoned, they will not be revived. The banner has a 180-second cool down. So only use it during emergencies!
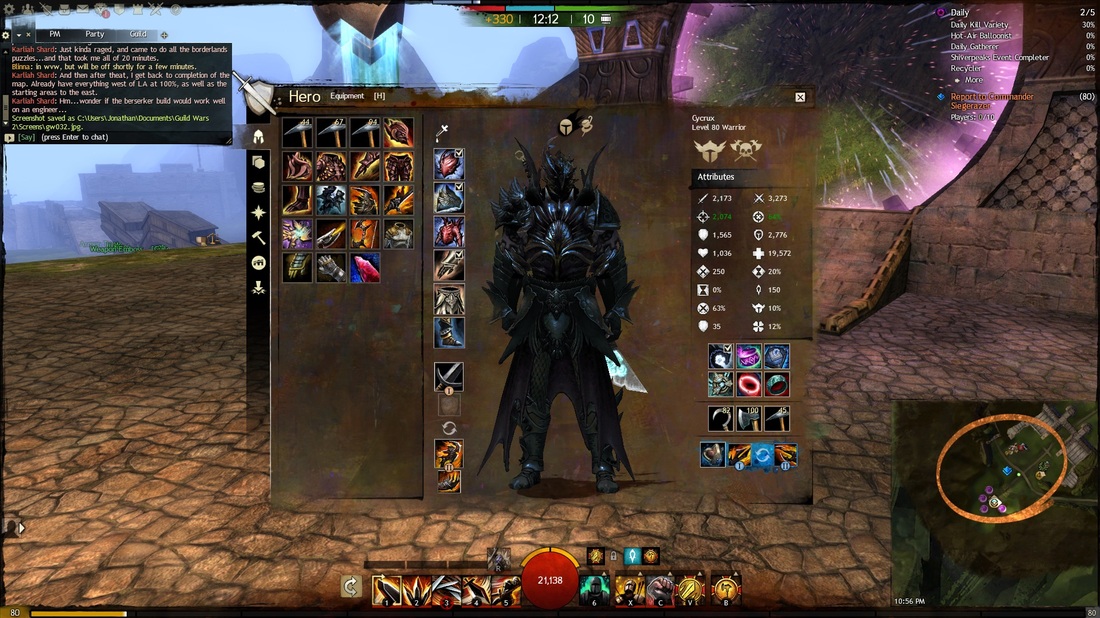
Items wise, I am simply on weapons, armors and trinkets with berserker stats. This means that all of them grants you Power, Precision and Critical Damage.
I apply Ruby Orb upgrades on my armor as they are more affordable than the ever popular Rune of Eagle. As of 15th of August 2013, 1 Ruby Orb costs 22 Silvers and 11 Coppers while 1 Rune of Eagle costs 3 Gold and 20 Silvers. Now remember, you will need 6 of these to apply on all your armors.
As for my trinkets, I apply agony resistance on them as I am a frequent Fractaler and they are all Ascended.
My Greatsword has Superior Sigil of Accuracy on it. It grants me 5% critical chance. Superior Sigil of Bloodlust which gives me an additional 10 Power per kill (Maximum of 25 stacks) for my Axe and Superior Sigil of Perception which gives me an additional 10 Precision per kill (Maximum of 25 stacks) for my Warhorn.
In my opinion, even though the damage done by the Greatsword has been decreased after a recent patche, it still performs relatively well in instances. It has a constant and stable DPS and is flexible.
Axe/Warhorn. Axe hits quickly and hard. Especially with the Burst skill, Eviscerate. The Warhorn gives Swiftness which can be quite useful when traveling.
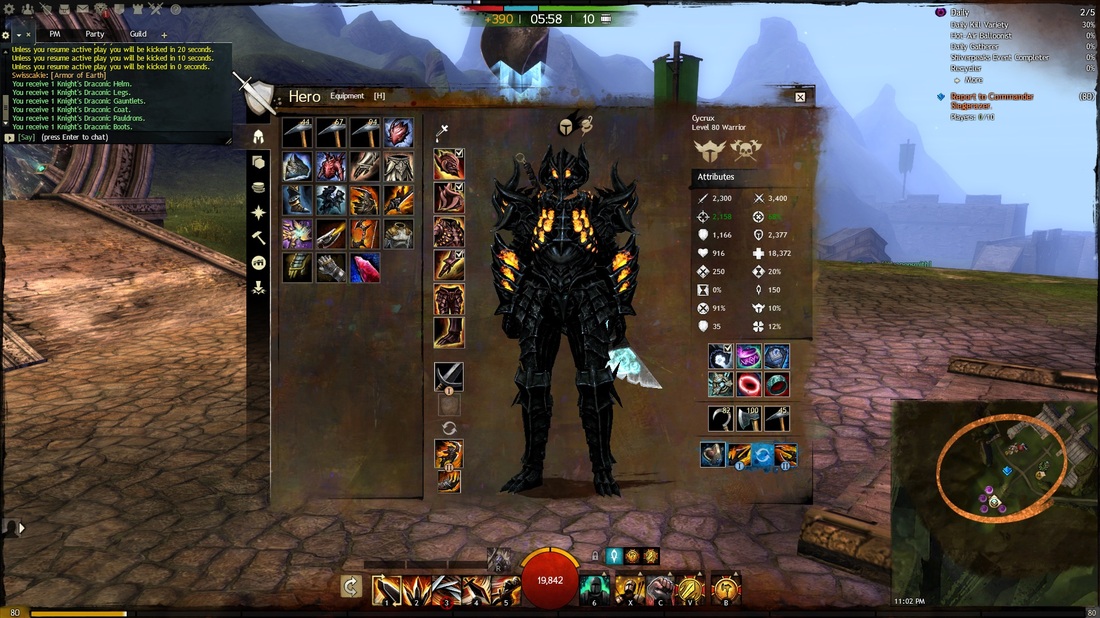
On a side note, this is the build my Warrior is currently on. He simply has the above Traits and Slot Skills, exactly the same.
The only difference between this build and the one above are the items. As you may have noticed, I have the same weapons and trinkets. Yes, they are exactly the same as the one above. Only the armors are different. On this Warrior, I have Knight armors which gives me Power, Precision and Toughness. I apply Azurite Orb Upgrades on my armors which give me Vitality, Power and Toughness. As of 15th of August 2013, each Azurite Orb costs 1 Gold and 82 Silver. Quite pricey, but trust me, it's worth every copper.
In terms of damage comparison, there is a slight drop with this build. I would say there is a 20% drop in damage with this build. However, it is worth the damage drop as this build gives me a much higher rate of survivability. In conclusion, the build above will give you a high DPS with low survivability while this build is very stable in terms of DPS and survivability.
